For Your Home
Unburden the Backyard
Say goodbye to your:
- Cracked concrete paths
- Chipped stepping stones
- Slippery patios & pool decks
- Punishing rock-hard surfaces
- Puddles & poor drainage
- Faded wooden planks


Say goodbye to your:


You can stop dealing with:


Rid yourself of:
20+ year lifespan
More friction for less slips
4 fade-resistant options

Rain, hail, snow or shine

Made from Recycled Tires
Manufactured in Lancaster, PA


Hurry, order your FREE sample now - limited time!


What is most important to you in an outdoor floor?


Choose 1 of the 4 options below:
 Concrete
 Plywood
 Asphalt
 Crushed Stone
Concrete
Plywood
Asphalt
Crushed Stone
Crushed Stone
Concrete
Plywood
Asphalt
Crushed Stone


There are two ways to install rubber pavers on concrete, both with unique advantages depending on your exact situation.
Glue-down method:
Loose-lay method:
Check your concrete slab for imperfections and structural issues prior to beginning installation. You want it to be:
Repair any loose patches, major cracks, or soft spots.
Remove anything from the slab which could block adhesion or telegraph through. Be sure to:
NOTE: For adhered installations on concrete, use ECORE E-Grip III adhesive, which has a maximum Relative Humidity (RH) limit of 85% per ASTM F2170. This is the standard adhesive for most applications, including outdoors. If RH exceeds 85%, switch to ECORE E-Grip 95 (up to 95%) or ECORE E-Grip 99 (up to 99%) as needed.
Test concrete slab moisture prior to adhered installation if conditions are uncertain as excess vapor can cause bonding issues.
Prior to installing, store your materials between 65-100°F (18-38°C) for 48 hours to prep them for the installation. During the install, try to avoid extreme temperature swings and direct sun where possible.
To help keep the layout square, use a chalk line on your slab:
NOTE: If going with the loose-lay method, skip ahead to the next step.
For glue-down installs over concrete:
Lay the pavers based on your installation choice.
Glue-down method:
Loose-lay method:
NOTE: Installing on plywood is only permitted for indoor installations.
There are two ways to install rubber pavers on plywood, both with unique advantages depending on your exact situation.
Glue-down method:
Loose-lay method:
When installing over plywood, the structure underneath matters. Make sure it’s:
Avoid particle board, OSB, Masonite, or lauan as they’re not suitable subfloors.
A clean, smooth plywood underlayment helps pavers sit flat.
For indoor installs, keep both pavers and adhesive in the installation space at 65-100°F (18-38°C) for at least 48 hours. Keeping the room weather-tight and climate-controlled helps minimize expansion and contraction during and after install.
To help keep the layout square, use a chalk line on the plywood:
NOTE: If going with the loose-lay method, skip ahead to the next step.
For glue-down installs over plywood:
Lay the pavers based on your installation choice.
Glue-down method:
Loose-lay method:
There are two ways to install rubber pavers on asphalt, both with unique advantages depending on your exact situation.
Glue-down method:
Loose-lay method:
Before installing over asphalt, make sure the surface is stable and well-built. You want it to be:
New asphalt should be allowed to cure for several weeks before you glue anything to it.
A clean surface helps pavers sit flat and helps adhesive (if used) bond correctly.
Prior to installing, store your materials between 65-100°F (18-38°C) for 48 hours to prep them for the installation. During the install, try to avoid extreme temperature swings and direct sun where possible.
Use a chalk line on the asphalt to help keep everything straight and square.
NOTE: If going with the loose-lay method, skip ahead to the next step.
When gluing down, get yourself a 1/8" square-notch trowel to spread the adhesive over the asphalt:
Lay the pavers based on your installation choice.
Glue-down method:
Loose-lay method:
NOTE: Installing on crushed stone is only permitted with the 1.75" pavers.
A compacted crushed stone base is ideal when you don’t have an existing slab and want a free‑draining outdoor surface.
Create room for a stable base and the pavers themselves.
The base is what keeps everything stable.
The final bedding layer should be smooth and even.
With loose-lay pavers on stone, the border does the holding.
Prior to installing, store your materials between 65-100°F (18-38°C) for 48 hours to prep them for the installation. During the install, try to avoid extreme temperature swings and direct sun where possible.
Even over stone, layout lines keep things looking straight and intentional.
Lay your pavers onto the crushed stone base:
Bottom line: Rubber pavers are a safer, more comfortable, lower-maintenance alternative to concrete, stone, or bricks. They offer strong slip resistance, handle cold-weather better, and are made from 100% recycled material.
Rubber pavers deliver a mix of safety, comfort, durability, and low maintenance that few other outdoor flooring options can match. Unlike concrete, which cracks in freeze-thaw cycles and requires regular sealing, or gravel, which shifts and needs constant raking, rubber pavers stay stable and functional for 15-20+ years with minimal upkeep.
The benefits most homeowners and facility managers notice right away are safety and comfort. Our ECORE rubber pavers provide superior slip-resistance, which is critical around pools, playgrounds, and entryways. They also have a shock-absorbing surface that reduces injury severity from falls by up to 40% compared to concrete or stone. That’s why gyms, daycares, senior communities, and equestrian facilities increasingly specify rubber pavers as a real advantage, not just a “nice to have.”
Beyond safety, rubber pavers are an environmental win. Made from recycled tires, roughly one tire per square foot, they divert waste from landfills while requiring 60-70% less energy to manufacture than virgin concrete. Permeable systems support stormwater management and can contribute to LEED certification, which makes them a strong fit for eco-conscious projects.
Key benefits at a glance:

Bottom line: Our rubber pavers typically last 15–20+ years, and 25 years isn’t unusual with a proper base and normal upkeep. Additionally, rubber pavers don't require the recurring sealing and crack repairs you see with many rigid pavers.
ECORE rubber pavers are built for durability and typically last 15-20+ years under normal use, with many installs still performing reliably at 25 years. That long lifespan comes from rubber’s natural flexibility and its resistance to the kinds of environmental stress that wear down more rigid surfaces.
By comparison, concrete pavers often last 15-25 years, but they usually require regular sealing (about every 2-3 years) and you’ll commonly deal with cracks, settling, and joint issues over time. Brick can last 50-100 years, but that lifespan usually depends on consistent upkeep like joint repointing and sealing. Rubber pavers, on the other hand, tend to maintain their integrity without all those recurring maintenance steps.
One of the biggest reasons rubber pavers hold up well is freeze-thaw resistance. In cold climates like Colorado, Illinois, Ohio, and other northern states, water can seep into joints, freeze, and lead to heaving or cracking in concrete and other rigid pavers. Rubber’s flexibility lets it handle those temperature swings without cracking or shifting, which is a real advantage when winters are rough.
Installation matters, too. A proper base and basic maintenance (annual sweeping and an occasional rinse) help maximize lifespan. And when installed to spec with ECORE’s recommended adhesive, E-Grip III, you get a durable bond and a surface that shows minimal wear over decades.
Durability factors:
Bottom line: Rubber pavers get warm in direct sun, but they usually run 15-25°F cooler than concrete, asphalt, bricks, or stone. They feel more tolerable underfoot, especially if you choose lighter colors.
Rubber pavers do warm up in direct sun, but they typically stay 15-25°F cooler than concrete on the surface. That’s a real advantage for pool decks, playgrounds, patios, and any area where people might be barefoot especially for kids or even pets.
Concrete, especially darker finishes, can hit 130-150°F on a hot, sunny day. At those temps, it’s not just “warm”, but can actually burn bare feet. Asphalt can get similarly hot. Rubber pavers generally feel more manageable because they don’t hold and radiate heat the same way dense, rigid materials like concrete, stone, or asphalt do.
Color matters too. Light shades stay cooler than dark shades, regardless of material. If heat is a concern, go lighter. Our gray and red rubber paver tend to be a smart pick for high-sun areas where barefoot use is common, while the black and green color options tend to get a little hotter in the sun.
There’s also a secondary benefit: cooler surfaces can mean less heat bouncing back into nearby spaces, which helps reduce heat buildup around homes, courtyards, and community spaces, and supports lower “heat island” impact in commercial settings.
Heat-related benefits:

Bottom line: Rubber pavers typically range from $10-$13 per square foot depending on thickness and quantity. That's comparable to premium pavers like bluestone or travertine, but with significantly lower lifetime costs due to the minimal maintenance requirements rubber pavers have.
The upfront cost of rubber pavers sits in the mid-to-premium range for outdoor flooring, around $10-13 per square foot. The real story however is total cost of ownership. Concrete may cost less initially ($6-$10/sq ft installed), but add in periodic sealing, crack repairs, and eventual replacement and the numbers flip.
Rubber pavers require no sealing, no chemical treatments, and typically last 15-20+ years without cracking or shifting. For most homeowners and facility managers, rubber pavers pay for themselves within 5-7 years through maintenance savings alone. We offer volume discounts for larger projects. Buy online or contact us for a quote.
Bottom line: Rubber pavers are naturally slip-resistant, even when wet. Their textured surface and inherent grip make them one of the safest choices for pool decks, entryways, barn aisles, and any area exposed to moisture.
Slip resistance is one of the top reasons people choose rubber pavers for pools, wash bays, and outdoor spaces. Unlike sealed concrete or smooth stone, rubber has a higher coefficient of friction allowing it to maintain traction when wet because of its porous texture and natural friction.
Our premium ECORE pavers are engineered with a surface profile that channels water away and provides grip underfoot—no coatings or treatments required. That's why they're specified for playgrounds, senior living facilities, equestrian wash stalls, and anywhere slip-and-fall prevention matters.
The rubber paver safety advantage:
Bottom line: Yes—rubber pavers are safe and beneficial for animals. The cushioned, non-slip surface reduces joint stress, prevents slipping, and is gentle on hooves and paws without being too soft and hard to walk on.
Rubber pavers are a favorite in equestrian facilities, dog kennels, and veterinary clinics because they combine safety with comfort. For horses, the shock-absorbing surface eases strain on legs and joints during grooming, washing, and turnout—critical for animals that spend hours standing on hard surfaces.
The slip-resistant texture prevents falls in wash stalls and barn aisles, even when wet. For dogs and other pets, rubber provides a softer, cooler surface than concrete, reducing paw fatigue and overheating. The material is non-toxic, easy to clean, and stands up to heavy use without cracking or shifting.
Why rubber pavers are great for animals:
Bottom line: Rubber pavers are UV-stabilized and designed for outdoor use, so significant fading is rare. You may see slight mellowing over many years, but the color remains consistent and attractive long-term.
Our ECORE rubber pavers are manufactured with UV inhibitors built into the material, not just applied as a surface coating. This means the color is protected throughout the entire thickness of the paver, not just on top.
In real-world use, customers report that colors hold up well even in full-sun locations like pool decks and patios. Over 10-15+ years, you may notice some natural mellowing—similar to how a deck or stone patio develops character—but dramatic fading or discoloration is not typical. Darker colors (black, gray, brown) tend to show the least change over time.
Rubber pavers stay vibrant:
Bottom line: Yes, but use the right thickness. Our 1.75" rubber pavers are rated for vehicular traffic including cars, trucks, and light equipment. Standard 1" pavers are better suited for lighter occasional vehicle traffic and foot traffic.
If you're paving a driveway, parking area, or any surface where vehicles will drive or park, choose our 1.75" thick pavers. These are engineered to handle the weight and repeated stress of cars, trucks, golf carts, and light equipment without compressing or shifting.
For patios, walkways, pool decks, and other pedestrian-only areas, our standard 1" pavers are the right choice—they're lighter, easier to handle, and cost less. Not sure which you need? Our team can help you choose based on your specific project.
Rubber pavers for any use case:
Bottom line: Yes—our rubber pavers are made from 100% recycled commercial tires (about one tire per square foot) and are fully recyclable at end of life. They also require far less energy to manufacture than concrete or stone.
Sustainability is built into every rubber paver we sell. Each square foot diverts roughly one tire from landfills, and the manufacturing process uses 60-70% less energy than producing virgin concrete.
Beyond the material itself, rubber pavers support stormwater management when installed as permeable systems—water drains through the joints instead of running off into storm drains. For commercial projects, this can contribute to LEED certification and green building credits. At end of life (15-20+ years down the road), the pavers can be recycled again rather than ending up in a landfill.
The environment prefers rubber pavers:
Bottom line: Absolutely. Rubber paver installation is a true DIY project—no special tools or skills required. Most homeowners complete a patio or pool deck in a single weekend.
You don't need to be a contractor to install rubber pavers. The process is straightforward: prepare your base (concrete, compacted stone/gravel, asphalt, or plywood), apply adhesive if needed, add a border if needed, and lay the pavers. They cut easily with a utility knife, circular saw, bandsaw, or jig saw.
Our step-by-step installation guide (above) walks you through each method, and our team is available by phone or email if you hit any snags. Hiring a contractor is always an option, but most customers find DIY saves $3-$5 per square foot in labor costs.
Why DIY Rubber Pavers:
Bottom line: Rubber pavers are one of the most DIY-friendly hardscape options. You either adhere them with polyurethane adhesive to concrete or asphalt, or loose-lay the interlocking pavers over a prepared base with a border curb.
Installation is one of rubber pavers' greatest advantages. It’s more DIY-friendly than concrete, brick, or stone paving. Our pavers can be installed via two methods: adhered installation (bonded down with polyurethane adhesive) or loose-lay installation (no adhesive, but a border is required). Loose-lay installation only applies to the 1-3/4" interlocking pavers, while adhered installation applies to either the 1-3/4" or the 1" interlocking pavers.
For detailed step-by-step guidance, scroll up to access our interactive installation guide, which walks you through the process step-by-step with visuals, or read on for a summary:
After your base is prepped (whether compacted gravel or existing concrete), sweep the area clear of debris. Determine your starting point by measuring and snapping perpendicular chalk lines across the area. Because most borders aren’t perfectly straight or square, many installations start from the center which makes the edges easier when you get to them.
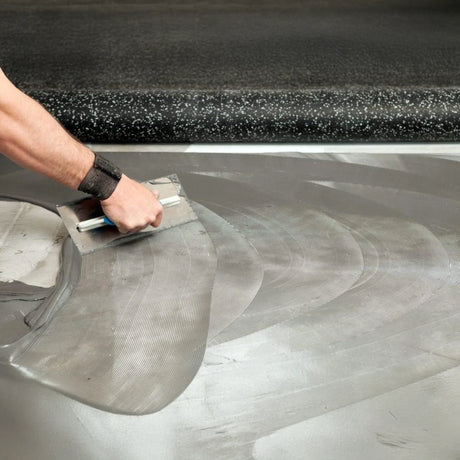
For an adhered install, apply ECORE’s E-Grip III polyurethane adhesive using a 1/8" square-notch trowel, then place pavers into the wet adhesive as you go. Work in sections and do not spread more adhesive than can be covered by pavers and rolled within 30 minutes. Trim edge pavers to fit using a jigsaw with a coarse blade.
ECORE also calls out acclimation: for indoor installs, pavers (and adhesive) should be acclimated at room temperature for a minimum of 48 hours before, during, and after installation. For outdoor installs, temperature and humidity affect how quickly the adhesive sets, so installers should adjust their pace and open time accordingly.
The entire process takes 2-3 days for a typical residential project (vs. 5–7 days for concrete paving). Our interactive tutorial covers material storage, job site conditions, substrate preparation, and post-installation curing, all important for long-term performance.
Installation highlights:

Bottom line: Rubber pavers stay in place either by adhesive bonding to the base (permanent install) or by simply laying them in an area surrounded by a perimeter border (loose-lay). If the base is solid and the edges are restrained, they won't shift...
Rubber pavers stay in place in two ways, depending on how you install them: mechanical interlocking (loose-lay) or adhesive bonding (adhered). The key is using the right method for your site so everything stays tight long-term.
Adhered installation (bonded down):
For adhered installs, ECORE recommends E-Grip III, a one-part polyurethane adhesive designed for rubber flooring. When it’s applied with the right trowel technique (an 1/8" square-notch trowel spreads at about 65 sq ft per gallon), it creates a strong, permanent bond between each paver and the substrate. It’s moisture-cured, meaning it hardens using humidity in the air and substrate, so there’s no mixing required. After it cures, the pavers don’t shift or creep.
Cure timeline: 24 hours for light use, 48 hours for regular/heavier use, and full cure at 72 hours.
Loose-lay installation (interlocking):
In loose-lay installs, the pavers lock together through their interlocking shape (often called a “dog-bone” pattern). That interlock helps prevent individual pavers from sliding around, while still letting the surface handle normal expansion and contraction with temperature changes. Loose-lay systems also require perimeter border curbing to keep the field contained and stop edge creep over time.
Which one should you choose?
Both are stable when installed correctly. Adhered systems are best when you want a truly permanent surface (patios, walkways, entryways). Loose-lay is great if you want the option to pull it up later, reconfigure the area, or access what’s underneath without fighting adhesive.
Stability mechanisms:

Bottom line: Rubber pavers go over a stable, well-draining base. Outdoors that’s usually concrete or asphalt, or an engineered crushed-stone base. Indoors, they can go over a hard subfloor or plywood underlayment.
What goes under rubber pavers depends on whether you’re installing outdoors or indoors, and what you’re installing over. The base matters because it’s what prevents settling, drainage problems, and pavers shifting over time.
When installing outdoors:
ECORE lists these acceptable surfaces: concrete, asphalt, and in some cases compacted crushed stone, depending on the product and install method.
If you’re building a base on bare ground, you’re essentially creating an engineered foundation: excavate about 9 inches, then rebuild with about 6 inches of compacted crushed stone (gravel) plus about 1 inch of stone dust for leveling, and make sure it’s properly sloped for drainage. ECORE calls out a drainage slope of 1 inch in 8 LF where applicable.
One important nuance: ECORE recommends that compacted crushed stone is tied specifically to the 1-3/4" interlocking pavers for loose-lay installs, and loose-lay requires a border, reducer, or curb. They also note that movement or subsidence in a crushed-stone base can happen and those conditions are warranty exclusions, which is another reason compaction and prep matter.
If you’re installing over existing concrete or asphalt, you can typically skip gravel. Clean the surface thoroughly, then adhere the pavers using E-Grip III with a 1/8" square-notch trowel, which ECORE states yields about 65 sq ft per gallon.
When installing indoors:
You can also install over plywood/wood subfloors, but this is an interior substrate callout, not an exterior one. ECORE specifies wood subfloors should be double construction with at least 1" total thickness, rigid and free from movement, with at least 18" of well-ventilated air space below. For underlayment, they prefer APA underlayment-grade plywood, minimum 1/4", fully sanded face. Avoid using particle board, chip board/OSB, Masonite, and lauan as underlayment materials.
Base material guidance:
Bottom line: Yes—concrete is the ideal base for rubber pavers. You can install directly over existing concrete using polyurethane adhesive, which creates a permanent, rock-solid bond without removing your old slab.
Installing over concrete is one of the most popular methods because it's fast, affordable, and avoids demolition costs. The concrete just needs to be clean, dry, and reasonably level (minor cracks and imperfections are fine—rubber pavers hide them).
Apply polyurethane adhesive in a thin consistent layer using a 1/8" square-notch trowel, set the pavers, and you're done. Most DIYers complete a typical patio in a single weekend. This approach works great for patios, pool decks, garage floors, and commercial entryways where tearing out the old slab would be expensive and disruptive.
Scroll up to see our interactive 'Installation Guide' to learn more about the steps involved with installing rubber pavers over concrete.
Bottom line: You can, but you shouldn’t. Rubber pavers on bare dirt almost always settle and go uneven. If you want it to last, build a proper base.
You can put rubber pavers directly on dirt, but it’s usually a short-lived install and not something we recommend. Bare soil isn’t stable. It settles unevenly, shifts with moisture and frost, and can trap water, which is why installs on dirt often end up uneven, wavy, or separating within a couple of years.
Here’s the issue: dirt has inconsistent density and it moves with frost heave in winter. When pavers sit on unprepped soil, settling is basically guaranteed. On a 500 sq ft patio, even an uneven drop of just ½ inch can create lips between pavers, gaps, and low spots where water pools, which speeds up wear and makes the surface feel “off” underfoot.
The right approach is base prep. our pavers specs call for excavating about 9 inches of soil and replacing it with about 6 inches of compacted crushed stone (gravel), topped with about 1 inch of stone dust. This engineered base creates uniform, stable support across the whole area, allows water to drain instead of pooling, and helps prevent freeze-thaw movement in cold climates. It also needs to be compacted to 95% Standard Proctor density so the surface doesn’t keep settling after the job is “done.”
If you’re installing over existing concrete or asphalt, you can usually skip the gravel, clean the surface thoroughly, and use adhesive. But for a new install on bare ground, a properly compacted gravel base is what gets you a patio that can last 15-20+ years without headaches.
Ground prep recommendations:

Bottom line: Use our online paver quantity calculator to calculate how many rubber pavers you need for your job. To use the calculator, CLICK HERE.
Approximately 3.42 pavers are needed per one square foot of space. We recommend adding an extra 5% of material to accommodate for cuts, mistakes, etc. as its much easier to have a few too many pavers than not enough.
Bottom line: Use our online adhesive quantity calculator to calculate how much adhesive you need for your job. To use the calculator, CLICK HERE.
One 4-gallon pail of adhesive will yield roughly 240 sq. ft. of coverage. Therefore, buy 1 pail of adhesive for every 240 sq. ft. (or 1 pail of adhesive for every 821 pavers).


ECORE Rubber Paver, 1" (24 mm)
1" Slim-Profile Outdoor Rubber Pavers
50.7% Force Reduction
51.6% Energy Restitution


ECORE Rubber Pavers, 1-3/4" (44.5 mm)
1-3/4" Thick Outdoor Rubber Pavers
50.7% Force Reduction
51.6% Energy Restitution


ECORE Rubber Paver Sloped Edge Reducer, 2.5" Wide
2.5" Sloped Edge Reducer for Rubber Pavers & Tiles


ECORE Rubber Paver Square Edge, 10" Wide
10" Square Edge for PaveSafe & Modzilla Rubber Tiles


ECORE Rubber Paver Sloped Edge Reducer, 12" Wide
12" Sloped Edge Reducer for 1-3/4" Rubber Pavers


ECORE E-Grip III Adhesive - 28 oz Cartridge
28 oz Zero-VOC Adhesive Cartridge for Rubber Floors
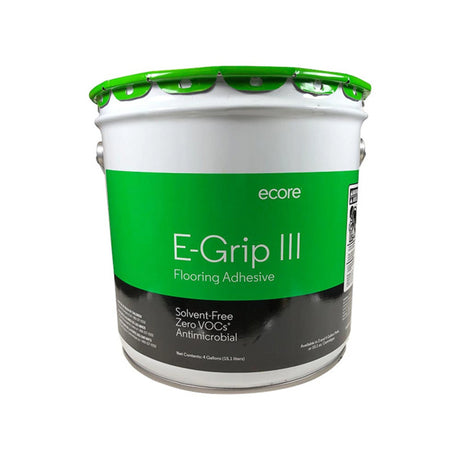
ECORE E-Grip III Adhesive - 4 Gallon Pail
4-Gallon Adhesive Pail for Rubber Flooring Install
